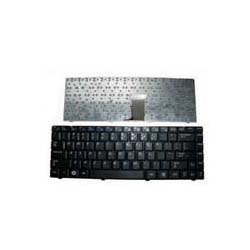
Buying the replacement keyboard
The first place to look for a genuine and reliable part will be eBay. This may cost $25 to $50 for a good product, however bargain prices can be found. This is cheaper compared to taking the laptop back to the manufacturer to repair for you. Te easiest way is to use the exact part number of the SAMSUNG NP-R519 Series Laptop Keyboard found at the back sticker under the keyboard. Another way is to search using the computer model number and series so as to avoid buying the wrong type that may visually seem similar.

First things first
In spite of the notion that it is a job to be left for qualified technicians, this is a very easy task. Since most keyboards are made by several Chinese companies other than the brand name on the front, this makes it a common procedure for most laptops. Start by powering down the laptop before opening anything, unplug from the socket and remove the battery. It is now safe to get a screw driver and go to work.
Removing the bottom keyboard screws
At the back of the laptop you will find a screw hole with a keyboard picture. Remove this screw to release the SAMSUNG NP-R519 Series Laptop Keyboard on the top side. Kindly note that not all keyboards have this bottom screw.
Removing the trim piece
The tricky part is removing the trim piece between the screen and the keyboard as shown in the picture below. If you have access to a service manual then you are in good hands. Some are fixed by screws on the bottom part, ensure you remove these first. If they are secured by clips to the bottom assembly then you can use a credit card to work forward along the edges. The seam between the trim and laptop will pop up when done carefully. Using a sharp item like a screw driver may damage the plastic or even cut wires that may be attached to the trim piece.
Remove the top keyboard screws
After removing the trim piece, you will find exposed some screws holding the keyboard in place. Take out the three or four screws carefully then slowly lift the SAMSUNG NP-R519 Series Laptop Keyboard up. Flip it upside down on the palm rest to give you space to finish unplugging its cables.
Unplug the keyboard
You will see a ribbon cable from the keyboard to the motherboard. It is usually a Low insertion force (LIF) or zero insertion force (ZIF) cable connector. Carefully lift or move back the available latch holding the cable on the motherboard. Now remove the cable and any power wire for light that may be seen and your keyboard is free.
Fixing the new keyboard
This is simply the reverse of the procedure above for removing the keyboard. Ensure you follow the sequence carefully and you will have a new keyboard fixed yourself.
